How to Add or Delete Members to an Outlook Distribution List
This document demonstrates how to add or delete members from a distribution list using the Outlook Client.
- Open the Outlook desktop application.
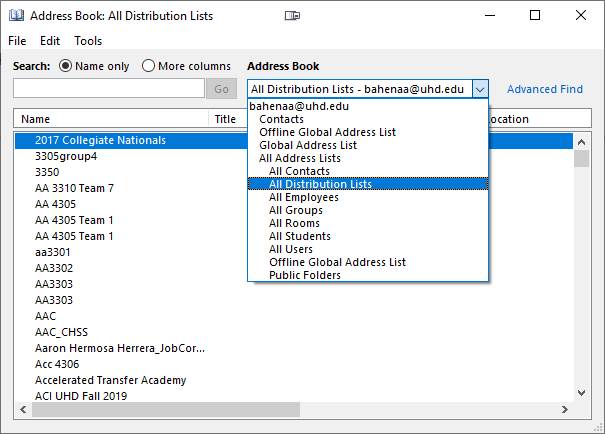
- Go to the Home tab and select Address Book.
- In the Address Book window, click the All Distribution Lists.

- In the Search box type the name of your distribution list (partial is ok)
- Click OK
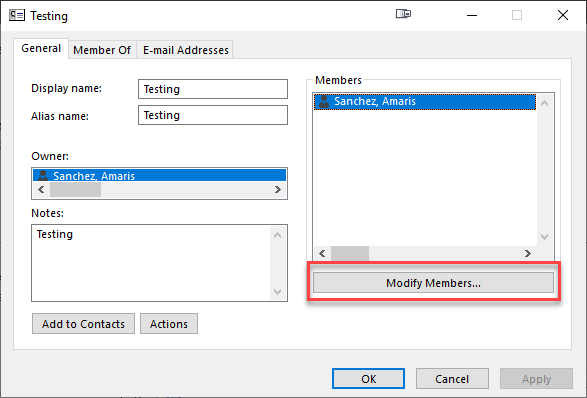
- Double-click your distribution group
- Click Modify Members

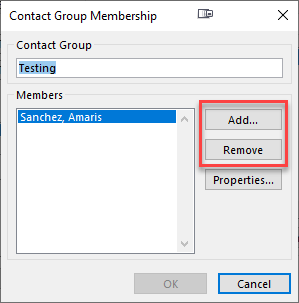
- To Add a member:
- Click Add
- Search for the member you wish to add a
- Double-click their name and then click OK.
- To Delete a member
- Highlight their name
- Click Delete
- Double-click their name and then click OK.

